Flutterデモアプリを立ち上げてみた
概要
この記事では最近個人的興味のあるFlutterについて
アウトプットしていきます
Flutter Projectを立ち上げる
flutterの環境構築が終わり、Android Studioでflutterが使えるようになりました!!
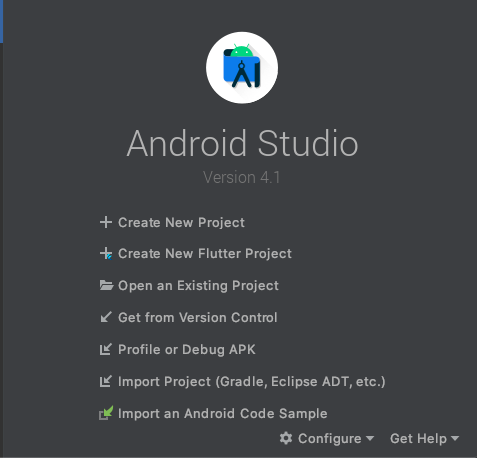
”Create New Flutter Project”をクリックし、
新しいプロジェクトを立ち上げてみましょう!!
立ち上げ準備
Create New Flutter Projectをクリックした後
以下の表示が現れます
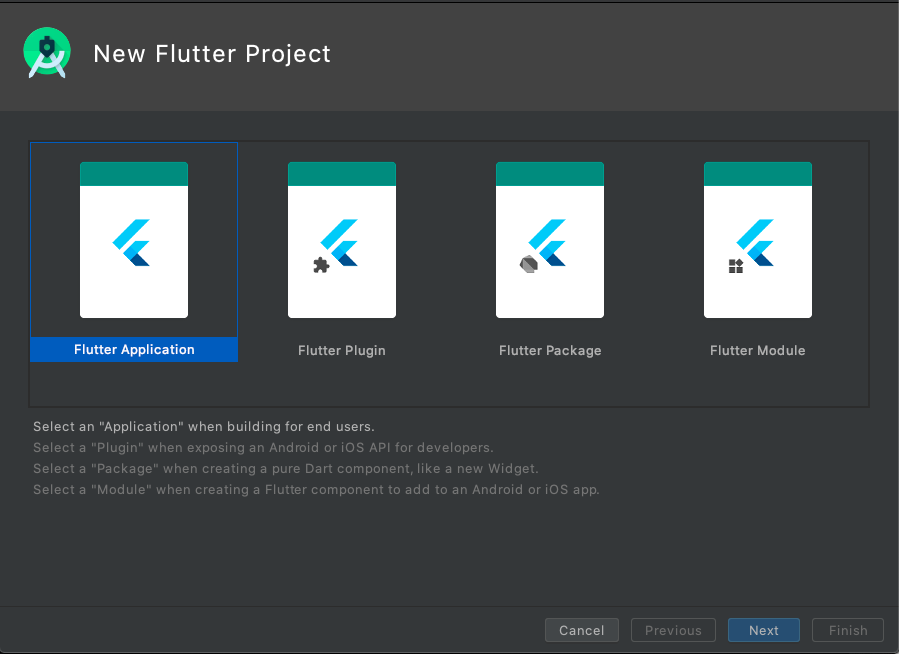
Flutter Applicationを選択します
次にアプリケーションの名前を記入します

好きな名前をつけてみましょう!
次はPackage nameをつけます
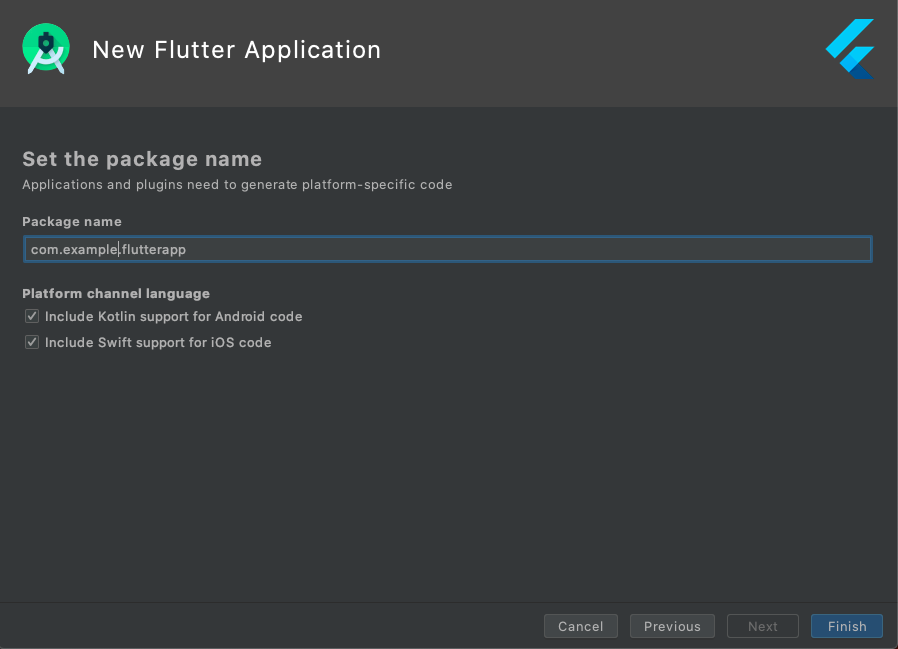
例として
flutterapp.example.comではなく
com.example.flutterappというように記入するようにしましょう
Finishを押して準備完了です!
main.dart
新しくFlutterプロジェクトを立ち上げると
main.dartの中身が表示されていると思います
あらかじめ用意されているデモアプリのコードが表示されます
以下がそのコードになります
class MyApp extends StatelessWidget {
  // This widget is the root of your application.
  @override
  Widget build(BuildContext context) {
    return MaterialApp(
      title: 'Flutter Demo',
      theme: ThemeData(
        // This is the theme of your application.
        //
        // Try running your application with "flutter run". You'll see the
        // application has a blue toolbar. Then, without quitting the app, try
        // changing the primarySwatch below to Colors.green and then invoke
        // "hot reload" (press "r" in the console where you ran "flutter run",
        // or simply save your changes to "hot reload" in a Flutter IDE).
        // Notice that the counter didn't reset back to zero; the application
        // is not restarted.
        primarySwatch: Colors.blue,
        // This makes the visual density adapt to the platform that you run
        // the app on. For desktop platforms, the controls will be smaller and
        // closer together (more dense) than on mobile platforms.
        visualDensity: VisualDensity.adaptivePlatformDensity,
      ),
      home: MyHomePage(title: 'Flutter Demo Home Page'),
    );
  }
}

class MyHomePage extends StatefulWidget {
  MyHomePage({Key key, this.title}) : super(key: key);

  // This widget is the home page of your application. It is stateful, meaning
  // that it has a State object (defined below) that contains fields that affect
  // how it looks.

  // This class is the configuration for the state. It holds the values (in this
  // case the title) provided by the parent (in this case the App widget) and
  // used by the build method of the State. Fields in a Widget subclass are
  // always marked "final".

  final String title;

  @override
  _MyHomePageState createState() => _MyHomePageState();
}

class _MyHomePageState extends State<MyHomePage> {
  int _counter = 0;

  void _incrementCounter() {
    setState(() {
      // This call to setState tells the Flutter framework that something has
      // changed in this State, which causes it to rerun the build method below
      // so that the display can reflect the updated values. If we changed
      // _counter without calling setState(), then the build method would not be
      // called again, and so nothing would appear to happen.
      _counter++;
    });
  }

  @override
  Widget build(BuildContext context) {
    // This method is rerun every time setState is called, for instance as done
    // by the _incrementCounter method above.
    //
    // The Flutter framework has been optimized to make rerunning build methods
    // fast, so that you can just rebuild anything that needs updating rather
    // than having to individually change instances of widgets.
    return Scaffold(
      appBar: AppBar(
        // Here we take the value from the MyHomePage object that was created by
        // the App.build method, and use it to set our appbar title.
        title: Text(widget.title),
      ),
      body: Center(
        // Center is a layout widget. It takes a single child and positions it
        // in the middle of the parent.
        child: Column(
          // Column is also a layout widget. It takes a list of children and
          // arranges them vertically. By default, it sizes itself to fit its
          // children horizontally, and tries to be as tall as its parent.
          //
          // Invoke "debug painting" (press "p" in the console, choose the
          // "Toggle Debug Paint" action from the Flutter Inspector in Android
          // Studio, or the "Toggle Debug Paint" command in Visual Studio Code)
          // to see the wireframe for each widget.
          //
          // Column has various properties to control how it sizes itself and
          // how it positions its children. Here we use mainAxisAlignment to
          // center the children vertically; the main axis here is the vertical
          // axis because Columns are vertical (the cross axis would be
          // horizontal).
          mainAxisAlignment: MainAxisAlignment.center,
          children: <Widget>[
            Text(
              'You have pushed the button this many times:',
            ),
            Text(
              '$_counter',
              style: Theme.of(context).textTheme.headline4,
            ),
          ],
        ),
      ),
      floatingActionButton: FloatingActionButton(
        onPressed: _incrementCounter,
        tooltip: 'Increment',
        child: Icon(Icons.add),
      ), // This trailing comma makes auto-formatting nicer for build methods.
    );
  }
}
何やら色々と書いてありますね😅
とりあえずエミュレーター 、シミュレーターを立ち上げてアプリを起動してみます
立ち上げ方はコード内のコメントにこう書いてあります
//Try running your application with "flutter run".
何やらflutter runを実行してみよ。とのことです
ターミナルにてflutter runを実行してみます

デモアプリ
デモアプリの中身は
「+ボタンを押すとカウントが1ずつ増えていく」
という簡単なアプリになります
ここから色々とカスタマイズしていくと面白いかもしれませんね😀
まとめ
デモアプリの起動を確認できました!
次回はコード内のコメントなどを見ていきながら
少しずつコードを書いていきたいと思います